Your app. Your opportunity.
How to Create an Apple Developer Account: Your Essential Guide for App Monetization
Publishers: unlock your app’s potential. A step-by-step guide to starting your journey on the App Store.

Your great app idea is just the first step. To bring it to life, to make it discoverable, and to turn it into a sustainable source of revenue, you need to enter the official ecosystem. The Apple Developer Account is your key to this world. It’s more than a simple registration; it’s your entry pass to a vast market, a suite of powerful tools, and the path to becoming a recognized publisher on the App Store. For anyone aiming to create, optimize, and monetize an app, understanding this process is non-negotiable.
This comprehensive guide is for you, the forward-thinking publisher. We’ll walk you through the entire process of creating an Apple Developer Account, from registration to approval. We’ll also delve into why this account is crucial for your business and how it lays the groundwork for successful app monetization and visibility.
Tabela de conteúdos (Índice)
1. What Is an Apple Developer Account and Why Is It Non-Negotiable?
An Apple Developer Account is a mandatory subscription that gives you access to the official Apple Developer Program. This program provides the tools, resources, and services needed to develop, test, and distribute applications for all Apple platforms—including iOS, iPadOS, macOS, tvOS, and watchOS.
Without an Apple Developer Account, you cannot publish an app on the App Store. It is the official gateway that verifies you as a legitimate developer or business, ensuring the App Store remains a secure and trusted environment for users.
Why an Apple Developer Account is a Strategic Asset for Publishers
- Official App Store Presence: It’s the only way to get your app listed on the App Store, making it visible to millions of potential users worldwide.
- Access to Essential Tools and SDKs: You gain access to Xcode, Apple’s integrated development environment, along with software development kits (SDKs) and APIs necessary for building your app.
- Monetization Capabilities: The account enables you to integrate monetization features into your app, such as in-app purchases, subscriptions, and, crucially for ad-based models, the ability to work with ad networks and partners.
- Development and Distribution Control: You can obtain development certificates, create app identifiers, and manage your app’s lifecycle from development to final release.
- EEAT and Trust: Having an official developer account is a clear signal of legitimacy. It shows users and the App Store that your app comes from a verified source, which builds trust and is a key component of your brand’s EEAT (Experience, Expertise, Authoritativeness, Trustworthiness).
2. The Two Types of Developer Accounts: Individual vs. Organization
Before you begin, you must choose between two account types. The choice depends on your business structure and your goals.
- Individual Developer Account:
- Who it’s for: A single person or a sole proprietorship. Your app will be listed on the App Store under your personal name.
- Cost: The annual fee is a recurring cost of $99 USD.
- Pros: Simple and fast registration process.
- Cons: Limited to a single developer. You cannot add team members. It is not suitable for businesses that need to scale their operations or have multiple people working on projects.
- Organization Developer Account:
- Who it’s for: Companies, non-profits, government organizations, and educational institutions. Your app will be listed under your company’s name.
- Cost: The annual fee is also $99 USD.
- Pros: Allows you to add team members with different roles and permissions, which is essential for scaling. It provides access to additional business features and resources.
- Cons: Requires more information and a more rigorous verification process, including a D-U-N-S Number (a unique business identifier) to confirm your legal entity.
For most publishers with long-term business goals, the Organization Account is the recommended choice due to its scalability and professional branding.
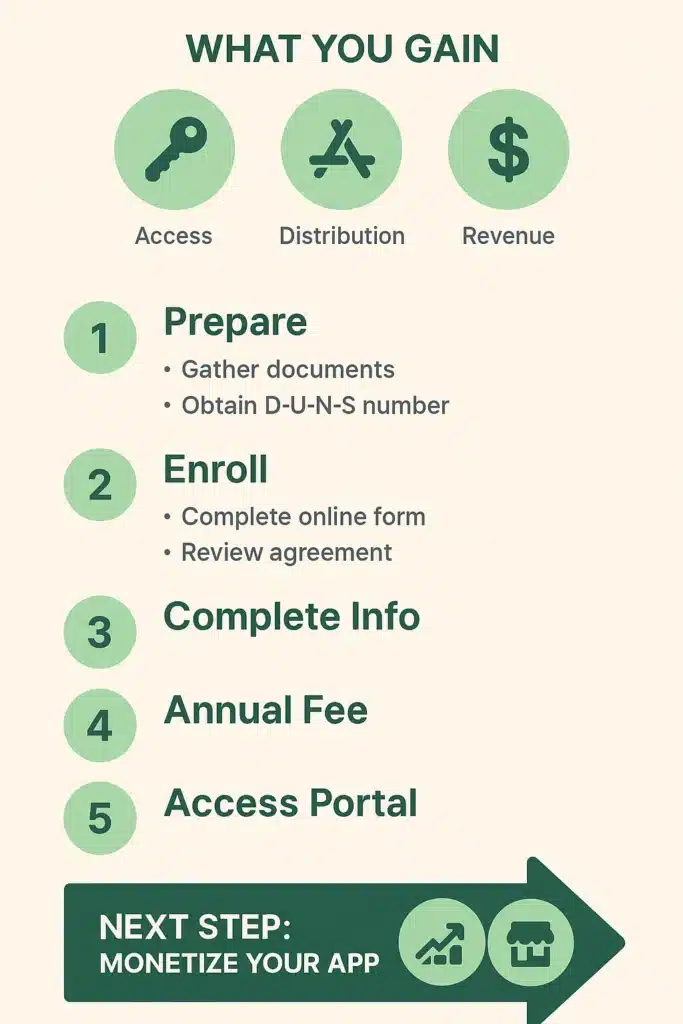
3. How to Create an Apple Developer Account: A Step-by-Step Guide for 2025
The process is straightforward but requires attention to detail. Make sure all your information is accurate and matches your legal records.
Step 1: Prepare Your Information and Apple ID
- Apple ID: You must have a valid Apple ID with two-factor authentication enabled. This is a security requirement.
- Legal Information: Gather all necessary personal or business details. For an Organization Account, this includes your legal company name, physical address, and D-U-N-S Number.
- Credit Card: Have a valid credit card ready to pay the annual fee.
Step 2: Begin the Enrollment Process
- Go to the official Apple Developer Program website.
- Click the “Enroll” button in the top right corner.
- Log in with your Apple ID.
- Select your desired account type: “Individual” or “Organization.”
Step 3: Complete Your Personal and Organizational Information
Fill out all the required fields. For an Organization Account, you will be asked for:
- Your Legal Entity Name: Must match your legal documents exactly.
- D-U-N-S Number: Apple will verify this number to confirm your business’s identity. If you don’t have one, you can request it for free.
- Company Contact Person: Provide the name and contact details of the person with legal authority to bind the organization to legal agreements.
Step 4: Pay the Annual Enrollment Fee
After completing the information, you will be prompted to pay the $99 USD annual fee. This payment activates your enrollment and gives you full access to the program’s features.
Step 5: Verification and Finalization
Apple will review your information, and this process can take a few days. For Organization Accounts, the verification is more thorough and may involve a phone call from an Apple representative to confirm your identity and authority. Once approved, you will have full access to the Apple Developer Portal.

4. App Store Optimization (ASO): Your First Step to Monetization and AEO
Creating your account is just the start. To make your app visible and profitable, you must focus on App Store Optimization (ASO), the mobile equivalent of SEO for websites. A strong ASO strategy is key for Generative Engine Optimization (AEO) and will attract the high-quality traffic you need to monetize effectively.
ASO: The Gateway to Discovery
- Keywords in App Name and Subtitle: Use high-volume, relevant keywords in your app’s name and subtitle. This is a primary ranking factor on the App Store.
- Compelling App Description: Write a clear and concise description that highlights your app’s benefits and features.
- App Previews and Screenshots: Use high-quality videos and images to showcase your app’s best features and user experience.
- Ratings and Reviews: Actively encourage users to rate and review your app. Positive feedback is a strong signal of quality and helps improve your ranking.
ASO and AEO: An Evolving Relationship
AI-powered search is now a factor in app discovery. By optimizing your app’s metadata with clear, concise language and answering user questions directly in your description, you make your app’s purpose easily digestible for AI models. This increases the likelihood of your app being recommended in AI-generated summaries or suggestions, a key aspect of AEO.
5. Monetizing Your App: The Publisher’s Revenue Stream
Once your app is ready for the App Store, your Apple Developer Account enables you to implement various monetization strategies.
In-App Purchases and Subscriptions
This is a direct monetization method where users pay for content, features, or a recurring subscription. Your developer account provides the tools to manage these transactions securely.
Ad Monetization with Ad Partners
If you choose to monetize with ads, your developer account allows you to integrate with ad networks and mediation platforms. This is where a partner like Grumft becomes invaluable. We help you:
- Integrate Ad Formats: Implement various ad types (banners, interstitials, rewarded video) that don’t harm user experience.
- Optimize Ad Mediation: Use technology to make multiple ad networks compete for your ad space, ensuring you get the highest possible CPMs.
- Maximize Revenue: Our experts manage your ad operations, providing the knowledge and tools to maximize your revenue while you focus on app development.
6. Common Challenges and Best Practices
Creating an account is just the beginning. Be aware of common challenges and best practices.
Compliance with Apple Guidelines
Apple has strict guidelines for app submission and content. Non-compliance can lead to rejections or account suspension.
- Best Practice: Read Apple’s App Store Review Guidelines thoroughly before you begin development and monetization to ensure your app meets all standards.
The Verification Process
For Organization Accounts, the D-U-N-S Number verification can be a stumbling block if your business information isn’t perfectly up-to-date.
- Best Practice: Start the D-U-N-S Number request process early and ensure all your business details are consistent across all legal documents.
Maintaining Your Account
The annual fee is recurring. If your payment information is not up-to-date, your account may be deactivated, and your apps will be removed from the App Store.
- Best Practice: Keep your payment information and contact details current to avoid any disruption to your app’s availability.
Frequently Asked Questions (FAQs)
What is the main purpose of an Apple Developer Account?
he main purpose is to give you access to the official Apple Developer Program, which is required to publish apps on the App Store and use all the necessary tools and resources for app development and monetization.
What is the cost of an Apple Developer Account?
What is the difference between an Individual and an Organization account? A: An Individual account is for a single person and publishes apps under their name. An Organization account is for a company and allows for team members, more advanced features, and requires a D-U-N-S Number for verification.
Do I need to be a developer to create an account?
No. You don’t need to be a developer to create the account. Many publishers or business owners create it to manage the business and monetization side of an app while developers handle the coding.
Can I change my account type from Individual to Organization later?
Yes, you can. Apple provides a process to convert your Individual account into an Organization account, but it requires that you have all the necessary business documentation and a D-U-N-S Number.
Conclusion
Creating an Apple Developer Account is a foundational step, but it is the strategic thinking that follows which determines your app’s success. By leveraging the tools and resources available through the account, focusing on strong ASO, and partnering with ad tech experts, you can turn your app into a thriving, profitable digital business.
Ready to start your journey on the App Store and monetize your app effectively? Grumft understands the complexities of app monetization. Our ad tech solutions are designed to help publishers maximize revenue while you focus on building great apps. Connect with our experts and let’s discuss how to turn your app into a powerful revenue engine.
🚀 Join the Monetization Revolution!
Follow Grumft on LinkedIn for exclusive SEO, engagement and revenue insights delivered straight to your feed.
Follow Grumft on LinkedInFurther Reading & Resources
- Apple Developer Program Enrollment
- Apple Developer Documentation
- What is a D-U-N-S Number and Why It Matters
- Monetize your App: Choosing the Right Mobile Ad Network
Leia também:

Tu WordPress es un Rascacielos Digital. ¿Estás Ignorando las Grietas en sus Cimientos?

Your Slow Website is Costing You a Fortune. Here’s How to Prove It.

SEO 2025: Publishers’ Ultimate Guide to Dominate Search & Monetize Traffic
Autor(a):
Fernanda Calandro
Online desde 1997, sou uma profissional de marketing e conteúdo com formação robusta em marketing. Especializada em simplificar temas complexos através das minhas redações, eu facilito a conexão entre publishers e especialistas, promovendo um entendimento claro e acessível.
